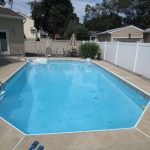
SO YOU THINK YOU HAVE A LEAK?
Have you ever shown up at a pool to take a dip and noticed a garden hose in the pool? Pool owners think that is a quick and cost effective fix to a leak. In reality, it can add up to lots of wasted time and money making leak detection services and repair a cheaper alternative.
What does a leak cost you?
Water – In NJ, we are charged for water and sewer costs!
Chemicals – As the water leaks out, so do the chemicals.
Time – Who is the person who has to turn on and off the garden hose?
Gas/Electric – If you area heating your pool, the heat is leaking out the pool at the same rate.
There are some preliminary items to address before leak detection and pressure testing are performed. First, you need to determine how much water you are losing a day. This should be performed on a day when there are no environmental factors (i.e., rain, high winds) and no bather use. Typical water loss from evaporation is under an inch, and bather splash out could be even more. If you are losing more than an inch a day, there could be a possible leak. In the Certified Pool Operator® certification course, you can learn how to calculate how many gallons of water need to be added to accommodate for the loss.
If you are losing more than an inch a day, the bucket test should be performed. Fill a bucket near the top with pool water and place on the first step of the pool. Mark the water level on the bucket with tape and the water level along the tile line of the pool with tape. The longer you can leave the bucket in that place undisturbed from swimmers and
weather, the more accurate picture we can get of the possible leak. Check the water levels often and log times and results. Be aware, when the system is running, pressure side leaks tend to lose more water.
Next, take a look around the yard for severe wet spots, excessive growth of a grass patch or dead grass, as this can be an indication of a leak and its location. Now that all the preliminary steps have been taken, Leak Detection and Pressure Testing can be performed. First, the inspector will check to see if the pool has a hydrostatic relief valve, and if it is open. A hydrostatic relief valve is located in the deepest part of your pool usually under the main drain cover. The purpose of the hydrostatic relief valve is to relieve the pool of water pressure for those with high water tables. In this case, the hydrostatic relief valve will open allowing the ground water to enter the pool to relieve built up pressure from underneath the pool. The valve typically does not need any maintenance. However, if the valve has opened then there is a chance that a tiny particle could get stuck in the seal when the valve closes again. The tiniest particle (which may not even be seen) could allow water to seep out of the pool into the ground, which could be the reason for water loss.
If there is no hydrostatic relief valve or if it is not open, a dye test will be performed. The system will be turned off and dye (it will not affect your pool surface) will be placed in the pool. The inspector will then see if the dye is sucked into any areas, such as returns or skimmers, which could indicate a leak.
Next, pressure testing will be performed on the skimmers and returns to make sure they hold pressure. If they do not, it may be a leak in that line. Then, leak detection will be performed on the area that has been ascertained to have a leak to get usually within a one foot range of where the leak is. Once the leak has been located, you can start the repair process and get back to swimming in no time!


