

THE WHO, WHEN, WHY, WHERE AND HOW OF WATER TESTING
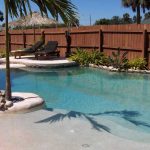
Water testing is an essential part of properly maintaining any body of water including pools, spa, hot tubs,
wading pools, spray grounds and water activity centers at both commercial and residential applications.
Commercial pools such as town pools, water parks, hotel/motel pools, community centers and fitness
clubs must follow state regulations on what to test for and when to test the water. While they have no
guidelines, residential pools should test frequently in addition to the testing that occurs from the pool
company’s weekly visit.
Pool operators and homeowners want to test to make sure their water balance is in the ideal range for, at
a minimum:
Sanitizer being used (chlorine and bromine are the most popular)
pH
Alkalinity
Calcium hardness
Cyanuric acid
Why do we need to test our water? Owners and operators need make sure a sanitizer level is being
maintained to combat algae and bacteria from forming. Having the proper sanitizer level will ensure all
bather waste is oxidized, any bacteria or algae that is forming is killed off, the pool components won’t be
effected by improper water balance and provide an enjoyable swimming experience for their bathers.
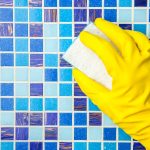
Testing the pool water can be quick and easy with a good test kit. There are many types of test kits on the
market. Commercial pools need to be able to show a DPD residual so a more elaborate test kit may be
needed than a general back yard test kit. In fact, many states do not allow the dip and test strips as an
approved testing methods for commercial pools. Still, determining which test kit is the best is often based
on user preference.
So how exactly, should you test your pool water?
1. Follow directions inside the test kit carefully.
2. Do not touch the inside or top of the vial or its cap. Do not directly touch any testing reagents. This will
falsely contaminate the test sample.
3. Choose a testing location away from an inlet that returns water from the filter to the pool.
4. Rinse the vial thoroughly with pool water.
5. To fill vial, turn upside-down and submerge the vial 12″-18″ below the surface water level. Turn the vial
right-side up and allow it to fill. Remove the vial slowly.
6. Remove water to the appropriate fill line by gently shaking the vial. If you shake out too much water,
start over at Step #3.
7. Complete the appropriate test by following directions carefully inside the test kit.
8. Read the results by holding a white card behind the vial and position yourself so the sun is behind you.
9. For commercial applications, record results in the Water Record Log. Recording must be done in pen,
not pencil. This is a legal document.
10. Rinse the vial thoroughly and dry with a paper towel. Any reagent that remains inside the vial may
stain the plastic and give false future readings.

